How to Load a Portable Container in 10 Easy Steps
Packing Tips and Hacks
Making a move soon? Hopefully you’ve already checked out our hacks for packing furniture, fragile items, and everything in between; ticked your way through a few of our moving checklists; or even learned how to score some free moving boxes from our other articles on the PODS Blog. But now, whether you’re all packed up and ready to load or you’re just doing a little pre-planning research, it’s time to learn how to get your things in your portable moving container — the right way.
Use the links below to jump to particular sections, if you know what you’re looking for.
1. Make A Plan Before You Start Loading
2. Create A Protected Loading Path
3. Disassemble Furniture
4. Place Heavy Items On The Bottom, Lighter Items On The Top
5. Roll Up Your Rugs
6. Determine Proper Weight Distribution
7. Keep Valuables Out Of The Container, If Possible
8. Pack It In Tight
9. Secure Everything As You Go
10. Lock It Up
1. Make a Plan Before You Start Loading
After you’re done packing up (or even while you’re packing), make a visual map of how you plan to load your moving container. Sure, it sounds a little tedious, but hey, don’t knock it ’til you try it. When it comes to learning how to load a moving container, diagrams can help you work out kinks well before you start juggling heavy pieces of furniture. Just take into account the specific measurements of items, stacks of boxes, and any cushioning you’ll add while loading. Flag what you’ll need to load first, and have it ready, accessible, and closest to the door on moving day.

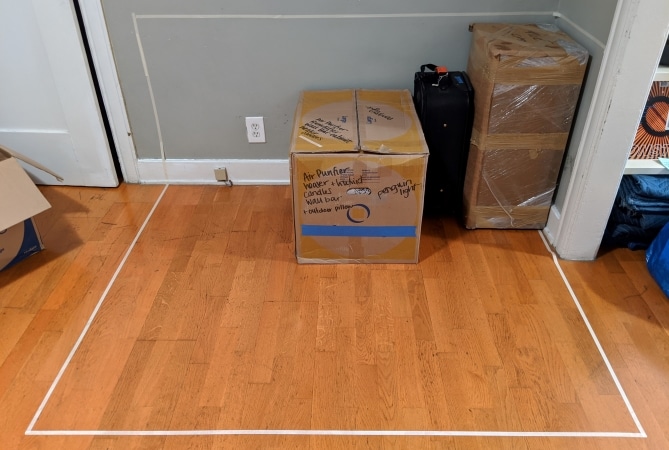
Depending on the size of your move, you may want to also consider taping up the floor and wall of an empty room to match the measurements of the available space inside your container to practice your Tetris technique. Another tip? Create an inventory of the items you’re moving and tackle two jobs in one go. You’ll have a list of everything you need to fit in your container — and you’ll be able to cross-check it to make sure everything is accounted for. It’s especially important to have an organized inventory list if you have multiple moving containers: Not only do you have more items to pack (hence the need for more storage space), but you also have more opportunities for items to get lost in the shuffle.
2. Create a Protected Loading Path
Keep the loading process as smooth as possible by making sure nothing gets in your way — literally. Create a clear moving path to keep a flow going as you load. A good rule of thumb is to make it about as wide as the front door (or whichever doorway you plan on using to move your things out of your house into your PODS container).
Don’t forget to protect your path, as well. Move all of your fragile, dentable, or otherwise damageable things out of the way. I like to pave the pathway with flattened moving boxes to protect the floor — just be sure to tape them together so they’re smooth and don’t cause you to trip. Want some packing extra credit? Pad the door frame with blankets, clothes, or bubble cushioning roll in case you bump any furniture against it. Let’s be honest, we all do it, no matter how careful we are.


3. Disassemble Furniture
Before loading your moving container, make sure all furniture that’s able to be taken apart is disassembled. This can help you make the most of your available space. Take tables and beds apart by removing the legs and then storing those legs on the truck.
Place tabletops, sofas, and headboards in an upright, vertical position (usually best on their long side). And be sure to add extra padding or protection around large pieces of furniture. Not only does this prevent the furniture from becoming dented, scratched, or damaged in any other way, but it also shields your smaller boxes from being crushed.
Q: How much stuff can fit in a PODS container?
A: PODS moving and storage containers come in three different sizes, so you can always find the best fit for your move. Our 16-foot PODS containers are largest and are ideal for a two-bedroom home or space that is around 1,200 square feet. Our 8-foot PODS containers work great for dorm rooms, studio apartments, or other spaces around 500 square feet. Both of these can be used for long-distance moves, while our 12-foot PODS containers can move and store your average 500- to 800-square-foot apartment and are available for shorter moves only.
4. Place Heavy Items on the Bottom, Lighter Items on the Top
When you’re ready to add your furniture and boxes to the storage container, load your items in the back first, then move your way forward in small sections.
Create a solid base in each section by loading heavy, sturdy, and bulky things first, like desks, tables, and couches. Then work your way to the ceiling by strategically stacking items, placing heavier items on the bottom and lighter items toward the top. Standalone things like bicycles and tall lamps should be loaded last and secured to ensure they won’t move around and get damaged in transit.
For our visual learners, the PODS YouTube channel also has some great resources with advice on how to load your container and what can fit in different sizes.
Loading an 8-foot PODS container
Loading a 16-foot PODS container
5. Roll Up Your Rugs
It may seem like a good idea to lay rugs flat on the container floor, but that’s a very tricky situation to maneuver. Instead, roll up all the rugs and secure them with plastic wrap. Place the rolled-up rugs upright to maximize space.
6. Determine Proper Weight Distribution
With moving containers, it’s recommended to keep the weight distributed evenly through the container in order to maintain stability over the truck’s axles.
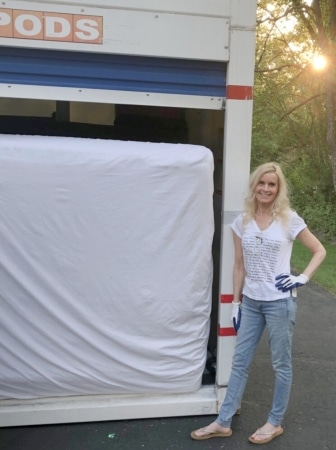
Moving with PODS? Congrats! You’ve got the added bonus of our unique PODZILLA® machine, which helps to keep things level during loading, transport, and unloading — greatly reducing the possibility of damages. Another PODS plus? Our portable containers stay at ground level while you fill them up. No ramp = hassle-free loading. Just ask Michele over at Hello Lovely. She found it so easy to move her son’s belongings into his 8-foot PODS portable moving container that she didn’t even feel the need to disassemble some of the heavier, bulkier furniture pieces.
7. Keep Valuables Out of the Container, if Possible
If you have sentimental jewelry, important documentation, or other irreplaceable items, keep them with you for the duration of the move. Even with the best policies in place, things can and do happen while items are in transit. Unless you’re heavily insured, it’s best to keep your most valuable possessions within reach during your move.
8. Pack it in Tight
Knowing how to pack a portable moving container up to the brim not only gives you more bang for your buck, but it also helps keep your items from shifting. After all, your things can’t move if there's no extra space for them to move into, right?
Now, don’t panic if your container isn’t filled top to bottom, left to right. Though you should aim to stack your items up to the ceiling and snuggly from wall to wall as much as possible, it doesn’t always work out to being perfectly flush. You can use smaller boxes and garbage bags full of clothes, linens, or pillows to help fill in any gaps — and also create a little extra padded protection.
9. Secure Everything As You Go
If your moving container rental doesn’t include ratchet straps or ties, it’s 100% worth getting some. We don’t have to tell you how dangerous it can be to open the door and be greeted with a waterfall of perfectly placed items that have slightly shifted during transport. Keep an eye out for hooks on the walls of your portable moving container. These are your anchors. As you load, secure straps or ropes to these anchors and create an “X” across the front of each section of packed boxes and furniture, so everything stays snugly — and safely — in place.
Not sure what or where else to secure? Try and think about how the contents might respond to repeated or sudden braking and bumps in the road. Secure any individual items and sections accordingly.
Q: How do you pack fragile items for a PODS container?
A: Fragile items should be wrapped and cushioned properly before being packed into a PODS moving container. Wrapping can be done with bubble cushioning roll, clothing, or towels; secured with tape; and ideally packed into a box with other fragile items and labeled as fragile. “Fragile” boxes should be loaded into the PODS container very snugly, in a space where they won’t be crushed from the top or sides.
| Pro Tip: As you secure the last few items closest to the door, tape together a few broken-down boxes to create a barrier between your stuff and the door. This helps prevent anything from falling in front of the door — and jamming it — during transit. |
10. Lock It Up
You’ve packed it, loaded it, and strapped it in. Now, don’t forget to lock it up. Use a secure lock, like a strong disc lock. These usually come with two keys, so make sure to keep one key on you and the other in a safe place — but never give a key to the moving company or anyone you don’t know or trust. (Note: PODS will never ask you for this key.)
| Packing for storage? If you’re using a portable container for storage, be sure to pack the things you’ll need more frequent access to last. That way, those items will be closest to the door of your container, easy to get to when you visit the secure PODS Storage Center. And remember, if you’re using PODS, storage is automatically included with every container rental. The container delivered to your driveway is the same container stored in our secure center, so you only need to load your items once. Easy peasy! |
Alex Keight is a frequent contributor to the PODS Blog who has moved 20+ times because she loves to experience new places.
Related Articles
Comments
Leave a Comment
Your email address will not be published. Required fields are marked *
